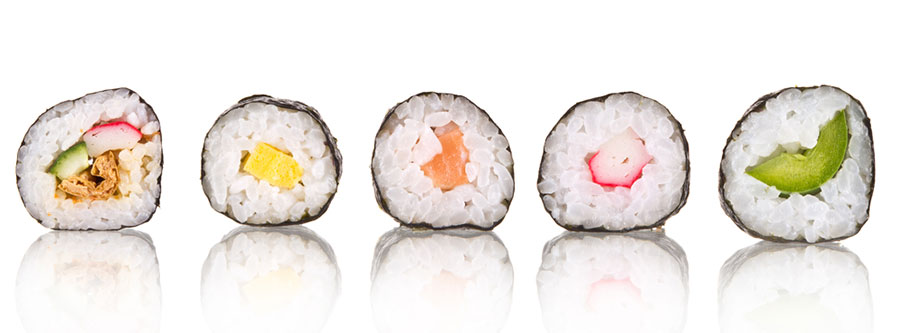
Note: Sushi is a bit finicky, but makes a great meal. Only try this when you have time to play around and are feeling adventurous. Once you get the hang of it, it will become a staple meal: protein plus carbs in a convenient ‘to-go’ packaging. Although the rolls you see in sushi restaurants typically contain fish, the same methodology works equally well with chicken or other protein sources.
Ingredients:
2 cups short grain rice (white works best, but you can use brown)
10-20 Nori sheets
Rice Vinegar
White Pepper (optional)
Protein Sources: choose as many as you like
Assorted sashimi*-grade fish, sliced thin
*Sashimi grade can be hard to find, but this is essential to avoid illness. If you can’t find it
from a reliable source, stick with the other protein sources
Cooked chicken, sliced thin
Smoked salmon
Canned tuna or salmon, drained
Cooked shrimp/prawns
Cod, halibut, or other white fish
Use your imagination!
Vegetables: choose as many as you like
1 Cucumber, sliced thin
1-2 carrots, sliced thin (or shredded carrot)
Pickled radish/daikon, sliced thin (available at Asian food stores)
Asparagus, cooked
Green onions
Sprouts
Portobello Mushrooms, cooked and sliced (or fresh)
To Serve:
Pickled ginger (optional)
Wasabi (optional)
Soy Sauce (optional)
Directions:
1. Cook rice in a rice cooker (or according to package directions). Sprinkle lightly with rice vinegar and a dash of white pepper (optional), mix gently with your hands, and allow to cool.
2. Cook and slice other ingredients as needed; if cooking, allow to cool.
3. Prepare work space: you will need a bowl of water, a flat surface (cutting board) to roll the sushi, and a plate to lay the rolls on. If you are planning on storing the rolls for a few days (not recommended with sashimi), you will also need saran/cling wrap to wrap the rolls.
4. Lay a piece of nori on your cutting board, smooth side down/rough side facing up.
5. Dip your fingers in water and grab a small handful (1/2 c or so) of rice. Gently spread evenly over the nori, leaving a strip on the upper margin (about 1″) bare for rolling.
6. Place a slice or two of protein along with 1-3 slices of vegetables about 1/2″ up from the bottom.
7. Using your fingers, gently spread a bit of water along the top (bare strip) of the nori. Using both hands, quickly grab the bottom and start rolling the nori/fillings upward, making sure to keep the roll tight. This is the finicky part – don’t panic if it tears, or starts to fall apart – it will still taste great!
8. Continue rolling until you reach the end of the nori. Use your fingers to fold the bare strip over the edge, sealing the roll. Set the roll, seam-side down, onto a plate while you finish the other rolls.
9. When you have finished making all your rolls, wrap them tightly in saran wrap to store.
10. When you are ready to eat, slice them cross wise and serve with soy sauce, ginger and wasabi.
Note: These rolls make great “to-go” lunches – just leave them wrapped in the saran wrap! When ready to eat, just unwrap them a bit at a time like a burrito 🙂